
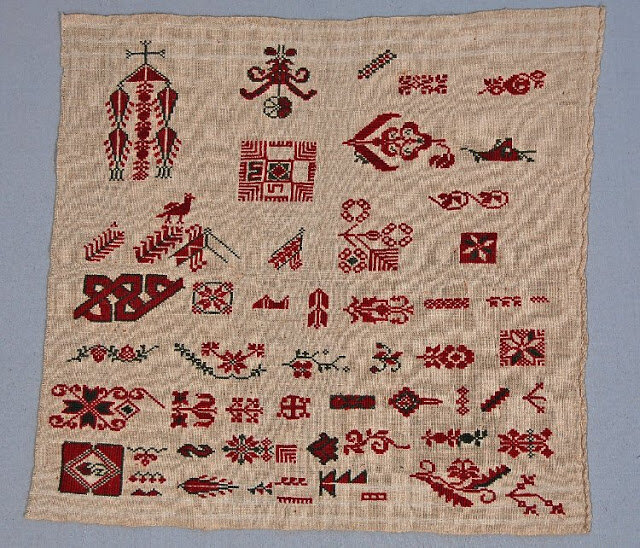
19th Century Sampler
Hello, dear Tatreez & Tea beginner students,
This blog is an instructional on how to create a tatreez sampler using Palestinian motifs taught in the beginner level classes. When first learning traditional Palestinian embroidery, many students feel that they need practice in order to advance to the next level. This is why I offer beginner level classes often, for a low sliding-scale cost, and for two-hour increments. You can independently determine how many beginner level classes you feel you need before you advance to waste canvas classes, series projects or special sessions.
Beginner level classes are not project-driven, in hopes that students may focus on learning traditional stitching techniques and strategy within the two-hour timeframe. Instead of ending up with dozens of swatches of Aida cloth around the house, you should consider creating a tatreez sampler on a 9 in. by 12 in. piece of 11 count Aida cloth. You are welcome to use any size Aida cloth, though 11 count is easy to work with on a beginner level and 9x12 cloth is often the standard cut.
19th Century Sampler
Many embroidery classes around the country, of various cultural practices, produce samplers with their students. A tatreez sampler is a piece of Aida cloth that incorporates various motifs in rows or in the creative arrangement of the student. The tatreez sampler is a valuable learning experience, because it prepares you for managing and designing a larger project.
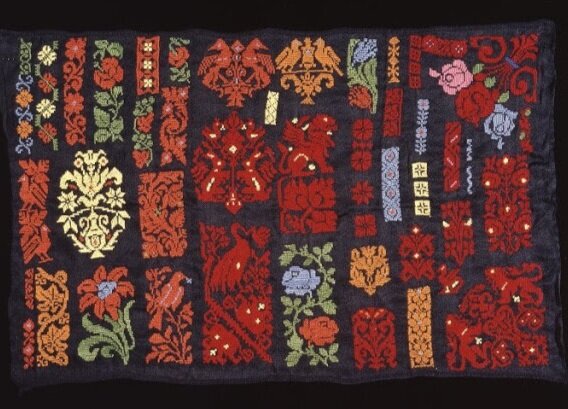
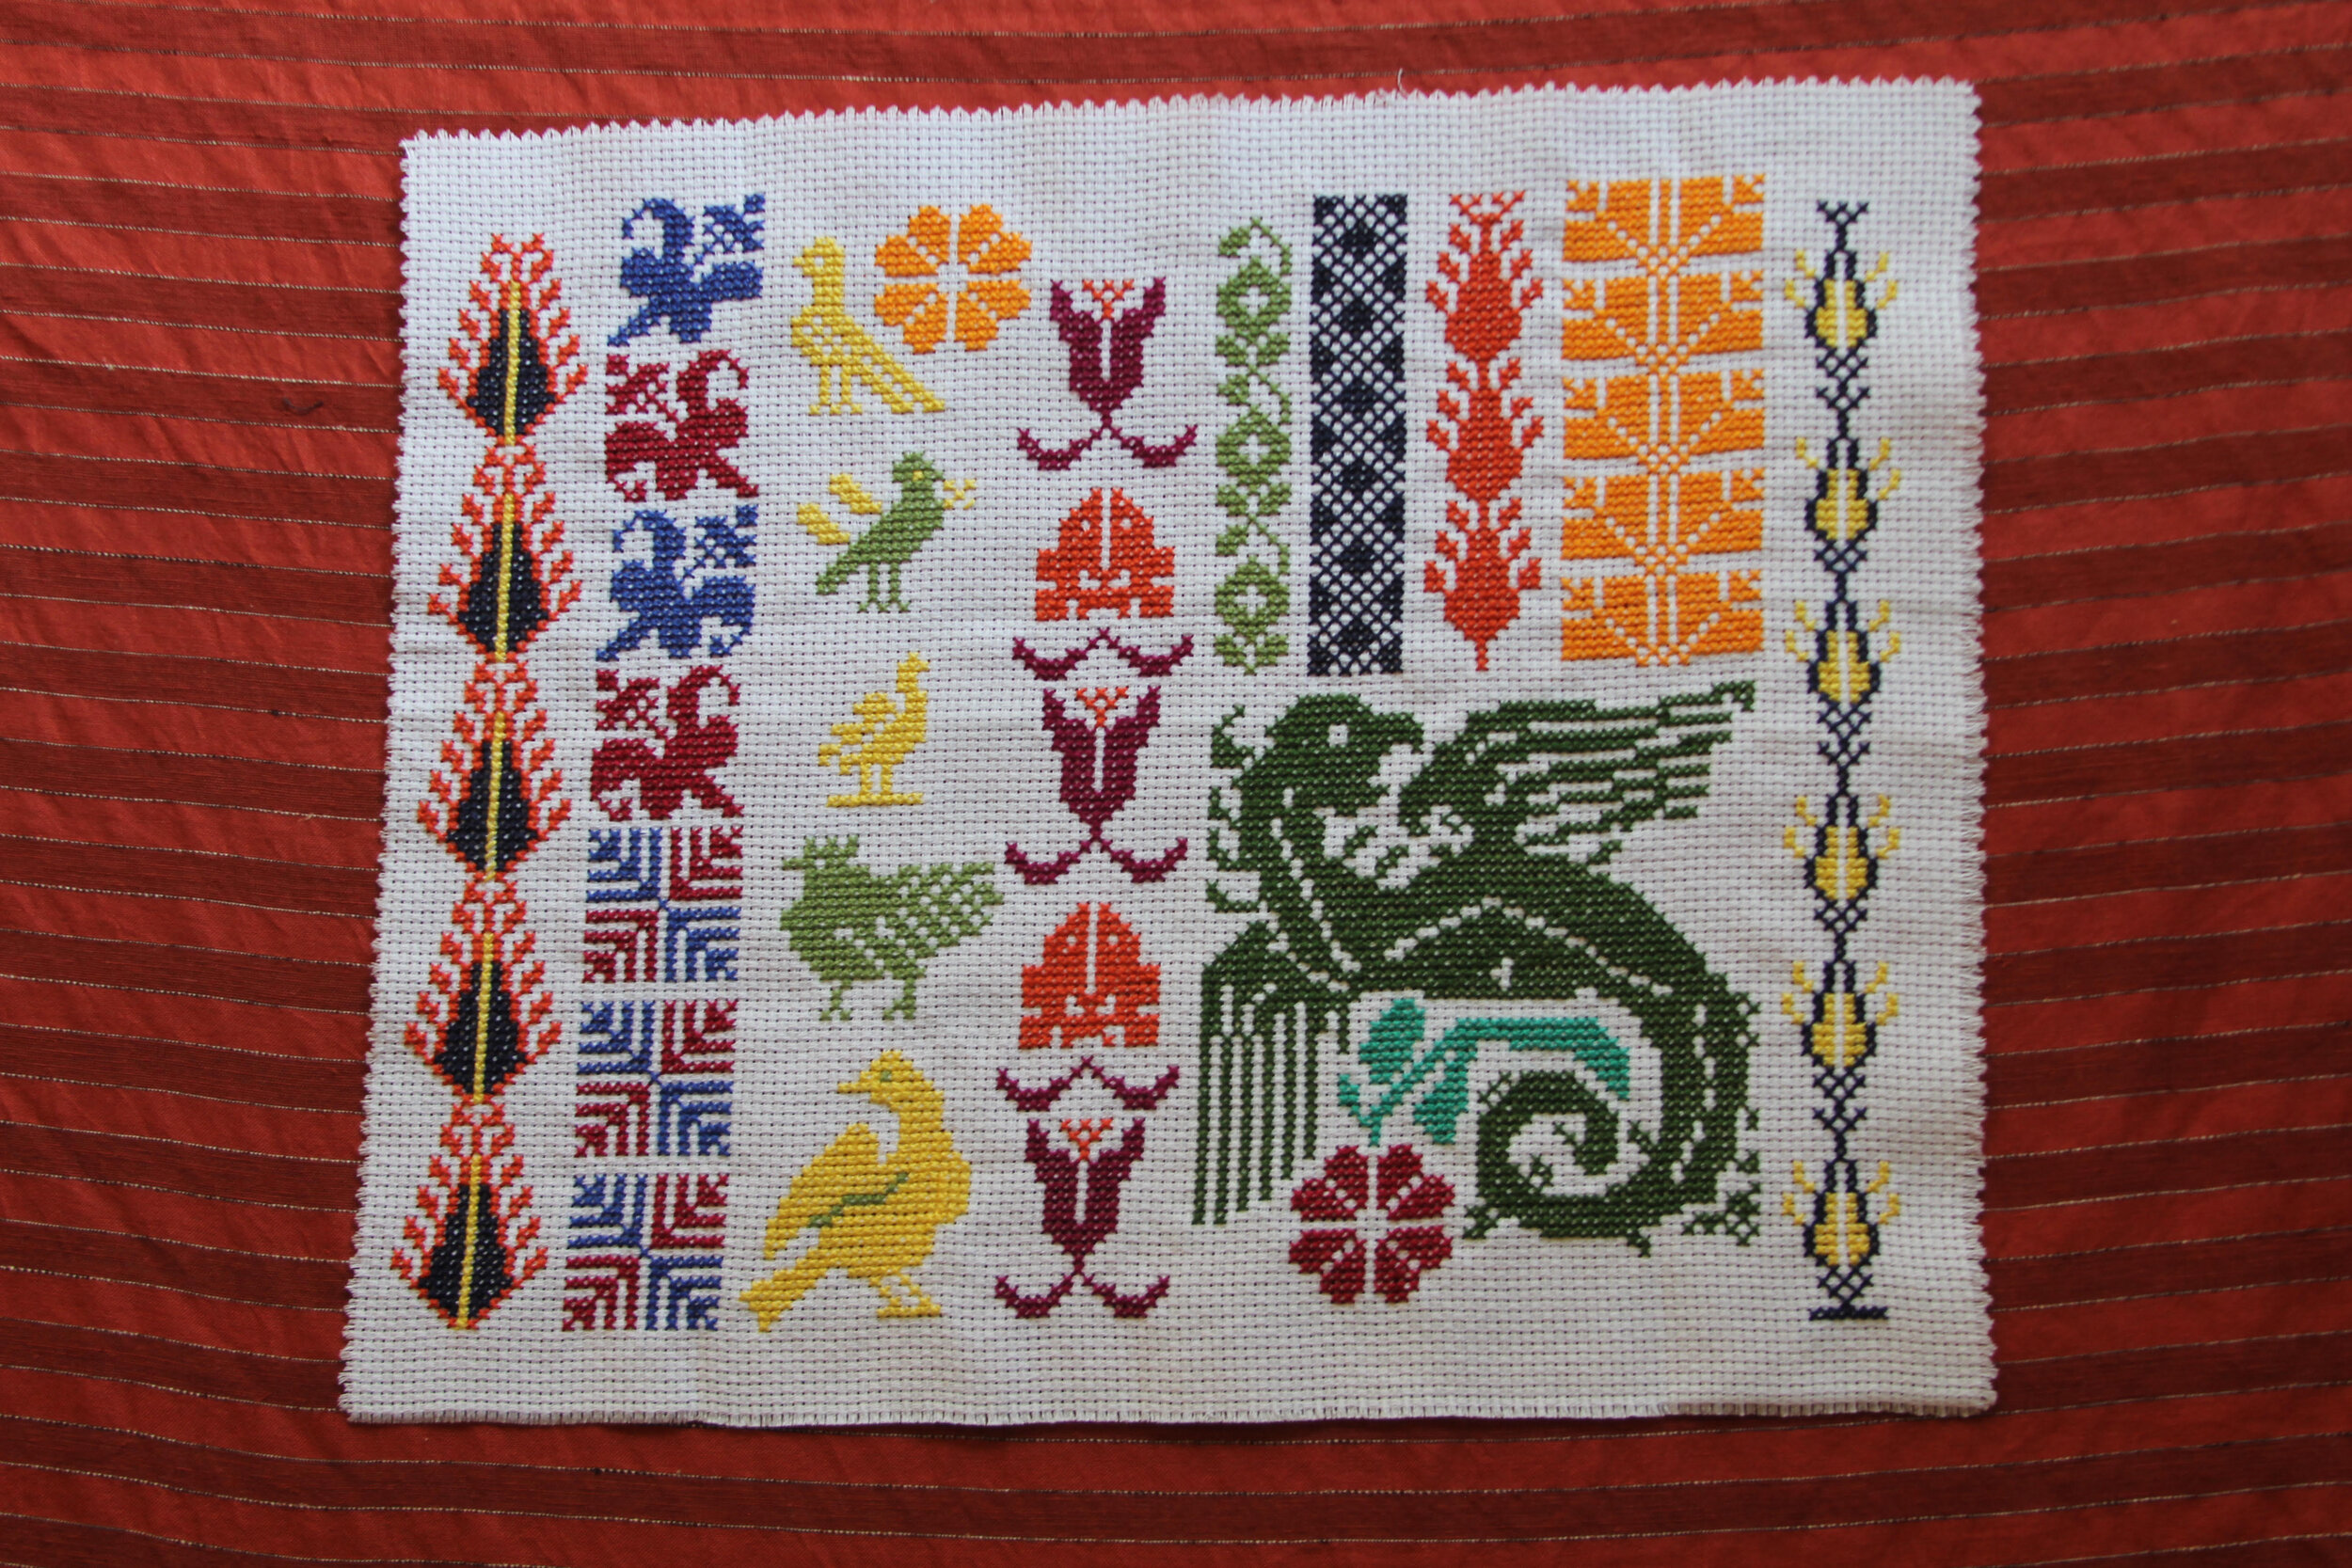
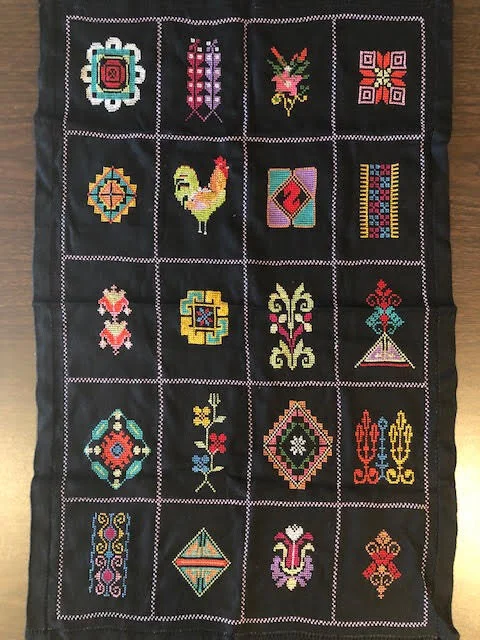
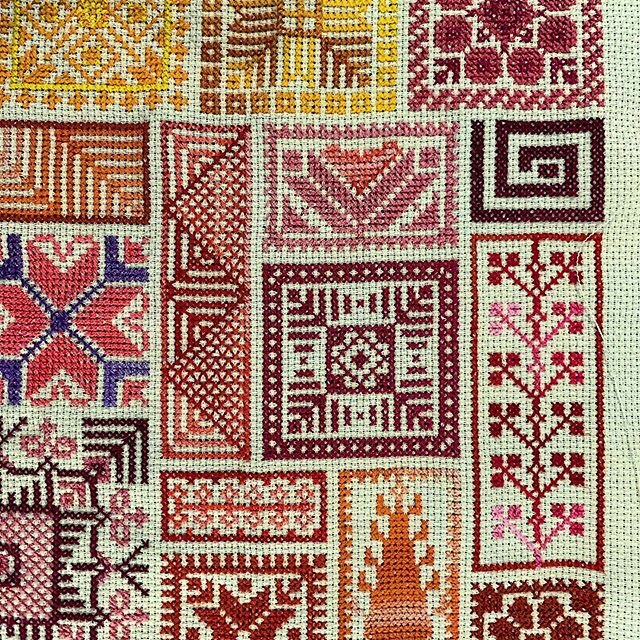
Below are a few examples of samplers, and please excuse the lack of citations. If you recognize one of these samplers as your own, please don’t hesitate to contact Wafa Ghnaim (wafa@tatreezandtea.com) who will happily provide credit.


Below are detailed instructions on how to start a tatreez sampler.
Step 1: Supplies
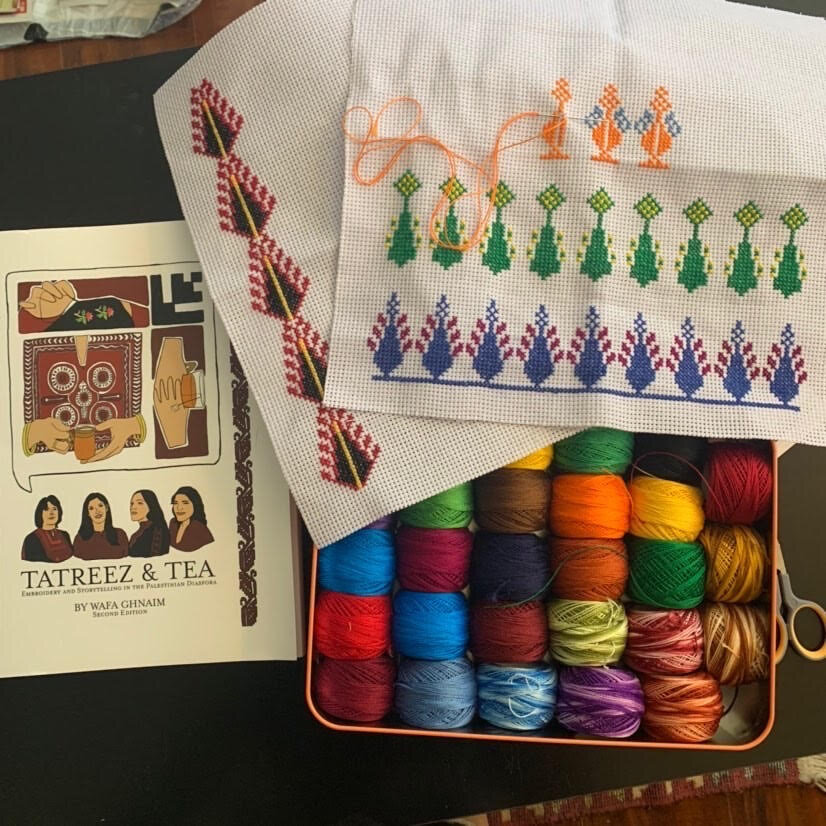
Ensure you have the correct supplies for your beginner level classes. The supplies are listed here. For a tatreez sampler, you will need a 9x12 or 12x12 (inches) piece of Aida cloth. You can go bigger if you have already worked with these sizes before. I suggest using 11 count. The samples provided below are for 11 count Aida cloth, and for a 9x12 inch piece.
Step 2: Color Palette
You can take a few different approaches to selecting your thread color palette for your sampler.
Traditional vibes:
The traditional colors used in Palestinian embroidery are red and black. DMC black is color number 310, and DMC traditional red color numbers include, and are not limited to 321, 498, 666, 814, 816, 902. Different practitioners have different preferences, and the ones listed above are the most popular in the Tatreez & Tea classes I have taught around the world in the past decade.
If you are interested in even more traditional vibes, consider reddish-browns paired with black or bold reds and oranges.
ONE-color:
How many colors you use are your preference. Sometimes, you are in the mood to stitch entirely in red, or purple, or black. I encourage you to make a plan, and stick to it. You can play with color as you wish on your sampler, but I hear most often from students that it is more helpful to make a choice before you start your project. This decision is one you will need to face ahead of a series or project-based class when you choose to move on in your Tatreez & Tea class levels.
If you are interested in learning the meanings and origins of the different thread colors, I suggest downloading Iman Saca’s downloadable book for free from the University of Chicago, titled Embroidering Identities: A Century of Palestinian Embroidery (2006). Download here.
TWO, THREE, and FOUR-color:
While not all Palestinian embroidery motifs are stitched in multiple colors, you can certainly use them. One of the most beautiful aspects of Palestinian embroidery is the creativity deployed by women in their color selection. Color selection can be a matter of heart, mind, or spirit (and more)! Below is some advice on what to do if you fall into one of these categories of decision-making.
HEART: For some of us, choosing colors is a feeling and something driven by our hearts. It has no analytical process. When we see the color combination we like, we know it. If this is how you understand and connect with the colors around you, you may choose to observe the natural elements around you such as a field of flowers, or on a hiking trail. You may feel inspired by a particular artwork that you enjoy or a quilt that you have always loved. If this is you, I suggest photographing what you like or setting it out in your house somewhere, and select colors that are closely related. Then, find a clear shelf to place your thread combinations for viewing over a period of days. Take your time.
MIND: For those of us that are a bit more analytical, choosing colors is more of a science. If this is the case, consider reviewing the color wheel, and identifying the differences between complementary and primary colors, or bold and mute colors. It is generally considered wise to avoid mute colors in combination with bold. If you would like to investigate some technical aspects to color, please take a look at my blog post here.
SPIRIT: If you are practicing this artistry because you are seeking ancestral connection, there is nothing more powerful than using the colors in your closet to inspire you. Pull out the embroidery in your closet, passed down to you from your mother or grandmother, and see what colors you like, or match. If you don’t have any embroidery, don’t feel sad or worried. Find an object that holds ancestral connection and sit with it, see it, and be present with what comes to mind. It may help you to meditate with the object near you, or to simply look at the object and analyze the colors used.
Multi-colored:
You are welcome to consider all colors and switch up your color palette on a per motif level. This is the best way to experiment and play with color if you are up for it.
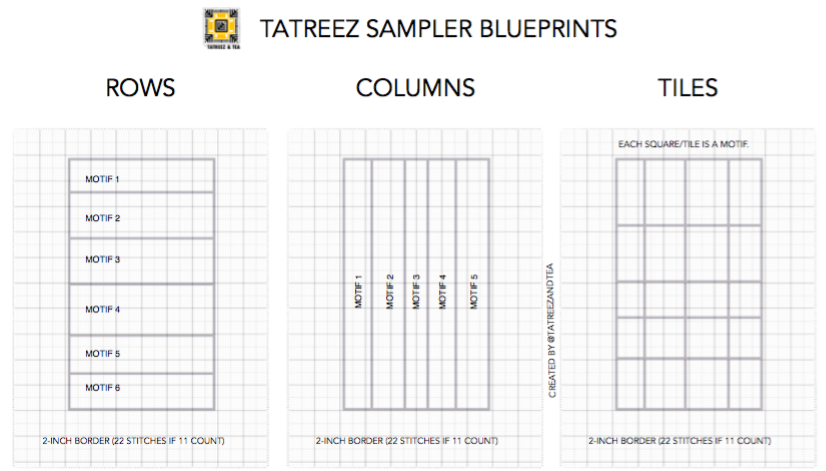
Step 3: Boundaries
Generally speaking, you will need a two-inch border all around your sampler if you choose to frame or finish the project in any way.
Step 4: Create a plan
Will you be approaching your sampler by stitching in columns, or rows or in tiling the motifs? Consider the options below for your blueprint.
Step 5: One stitch at a time
You will be stitching one motif every beginner class you take. You will have plenty of time to stitch the motif in repetition, according to your strategy. Be sure to complete the first motif as soon as possible after class, and to try and finish the row within a couple of days while the lesson is still fresh in your mind. All classes are recorded and available for 7 days after the live session.
If you don’t have many Level I classes lined up, you are welcome to explore patterns in my Tatreez Takeout program, an initiative to get you stitching anywhere and anytime. Each pattern includes a hand-drawn pattern, images of the pattern embroidered, stitching strategy, meaning, sources and history when made available. I consult with a library of over 30 books, as well as the private collections of embroidery I have toured over the past decade, to produce the patterns and research in each download. You will notice many of the patterns are not featured in published books and are drawn from live embroidery.
Step 6: Ask questions
I am sure you will have questions along the way. Please don’t hesitate to reach me, Wafa, at wafa@tatreezandtea.com so I may answer any questions you have.
Happy tatreezing!
Wafa